Modding a game used to require programming knowledge, an understanding of how the engine worked, and the ability to create graphics yourself. Now, part of that work can be handed over to an AI agent. The universal-modder plugin for Claude Code teaches the agent how to identify a game's engine, choose the right mod loader, write code, generate sprites, and test the result in the running game. In this guide, we'll explain how the plugin works, how to install it, and how to create your first mod with it.
What Is universal-modder

universal-modder is a free Claude Code plugin that helps an AI agent create mods for almost any PC game. It was developed by Rehan, is available as an open-source project on GitHub, and is distributed under the MIT License. At the time of writing, the current version is 0.2.0. We previously covered how universal-modder generates assets, writes code, and tests mods directly in the game.
Claude Code can write code on its own, but it does not automatically know how a specific game is structured or which mod loader its community normally uses. The plugin fills that gap. It gives the agent a set of skills with instructions for different engines, the um command-line tool for working with games, and access to fal, a service that can generate sprites, textures, 3D models, and audio.
The plugin can be useful both for players who want to add a custom item, enemy, or mechanic to a favorite game without knowing how to program, and for beginner modders who want help examining game code and finding the right functions.
How to Install universal-modder for Claude Code

Before installing the plugin, you first need to download and install the AI agent that will write the code for you. In this case, that agent is Claude Code.
How to Install Claude Code
Claude Code is an AI coding agent from Anthropic that runs in the terminal. It can read and create files, run commands, and write code on your computer. To use it, you need a paid Claude subscription such as Pro, Max, Team, or Enterprise, or a Claude Console account with API billing enabled.
System requirements:
- Windows 10 version 1809 or later, macOS 13 or later, or Ubuntu 20.04 or later.
- At least 4 GB of RAM.
- An internet connection.
- Git for Windows is recommended on Windows.
Most games you are likely to mod run on Windows, and some of the plugin's tools, including game launching, screenshots, and video recording, are designed specifically for it. For that reason, the rest of this guide focuses on the Windows installation process.
Installing Git for Windows

Go to the official Git website, download the installer, and run it. You can leave the default settings unchanged throughout the installation. Git is needed for two reasons: Claude Code uses the Git Bash shell included with it, and the plugin itself is downloaded from GitHub.
Installing Claude Code
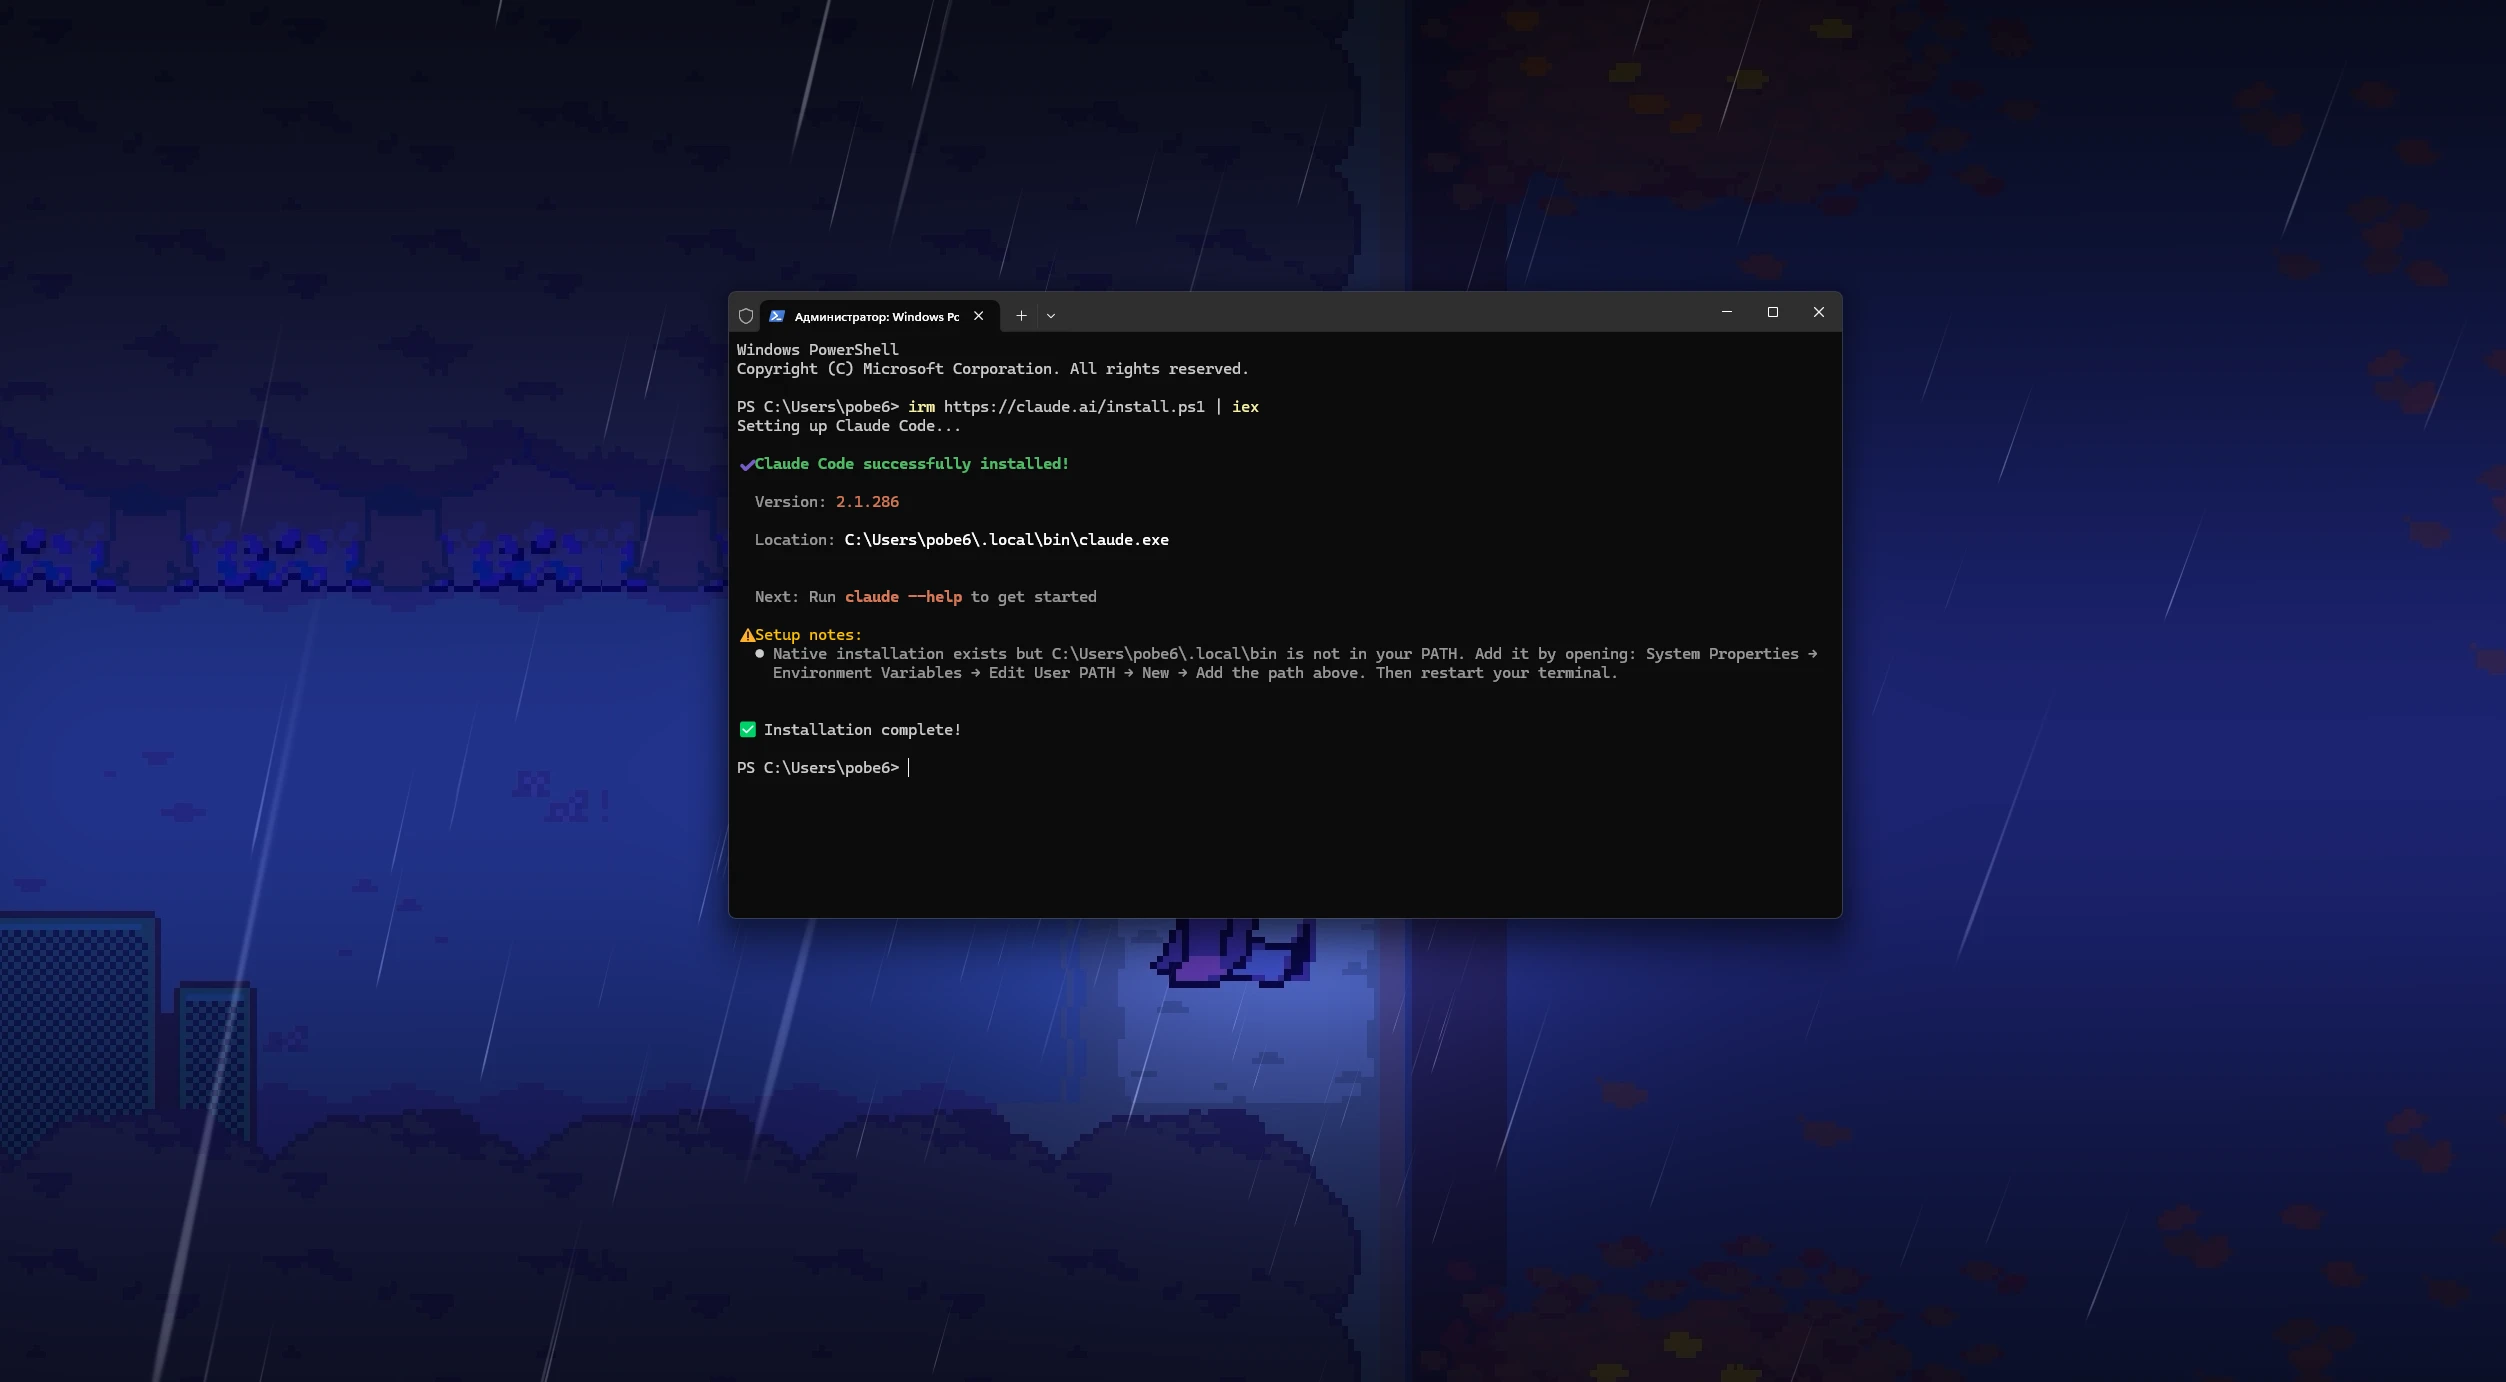
Right-click the Start button and select Terminal or Windows PowerShell. Paste irm https://claude.ai/install.ps1 | iex into the window and press Enter. On macOS and Linux, open a terminal and run curl -fsSL https://claude.ai/install.sh | bash. After the installation finishes, close the terminal and open a new window. Navigate to the project folder you want to use and start Claude Code with claude. You can verify the installation with claude --version, which should return the installed version number. If something went wrong, run claude doctor and the program will tell you what is missing.
First Launch and Account Sign-In

Create a separate folder for future mods, for example C:\mods. The agent will store code, assets, and its work log there. Open a terminal in that folder and launch Claude Code with claude. On the first run, the program will ask you to choose a color theme and a sign-in method. Choose either a Claude subscription or Console authentication. A browser page will open for authorization. Sign in, approve access, and return to the terminal. Finally, Claude Code will ask whether you trust the current folder. Confirm it, and the message input will appear.
How to Connect universal-modder

Before installing the plugin itself, it is worth setting up the programs used by its toolchain. After that, you only need to add the plugin to Claude Code and provide an API key for the asset-generation service.
The toolchain uses the following components:
- Python 3.10 or later. The command-line utility itself is written in Python.
- uv. The recommended Python package manager. With uv installed, um can download the required libraries automatically on first launch.
- ffmpeg. Used for recording and editing video.
- Blender. Only required if you want to turn 3D models into sprites.
On Windows, all of these programs can be installed through the built-in winget package manager. Open a terminal and run the following commands one by one:
- winget install Python.Python.3.12
- winget install astral-sh.uv
- winget install Gyan.FFmpeg
- winget install BlenderFoundation.Blender
Restart the terminal after installation. Run python --version, uv --version, and ffmpeg -version to make sure everything was installed correctly.
Installing the Plugin

Start Claude Code inside your mods folder and enter the command that adds the plugin marketplace: /plugin marketplace add rehan-remade/universal-modder. Then install the plugin itself with /plugin install universal-modder\@universal-modder. The program will ask which scope to use. Choose User so the plugin is available in any folder. After installation, check the message from Claude Code. If the plugin requires its components to be reloaded, run /reload-plugins. If you use Claude Desktop, open a local Code session, click + next to the input field, then choose Plugins > Add plugin. Add the universal-modder marketplace, install the plugin, and choose the installation scope you need.
How to Get a fal API Key

fal is a service for generating images, assets, models, and other resources needed for mods. The plugin still works without an API key, but the agent will not be able to generate sprites, models, or sounds on its own. The service is paid: every generation is charged against your balance, and 3D models and video are among the most expensive tasks. Go to fal.ai, create an account, and add funds to your balance. Then open the API keys page, create a new key, and copy it. The key is only shown once, so save it immediately. Next, pass the key to the system through the FAL_KEY environment variable. On Windows, run the following command in the terminal, replacing the placeholder with your own key: setx FAL_KEY your_key.
On macOS and Linux, add export FAL_KEY=your_key to the \~/.bashrc or \~/.zshrc file. Then restart the terminal. You can also place the key in a .env file inside the project folder using FAL_KEY=your_key. The um utility can read it from there, but the fal MCP server in Claude Code reads the key only from the environment variable.
Plugin Commands
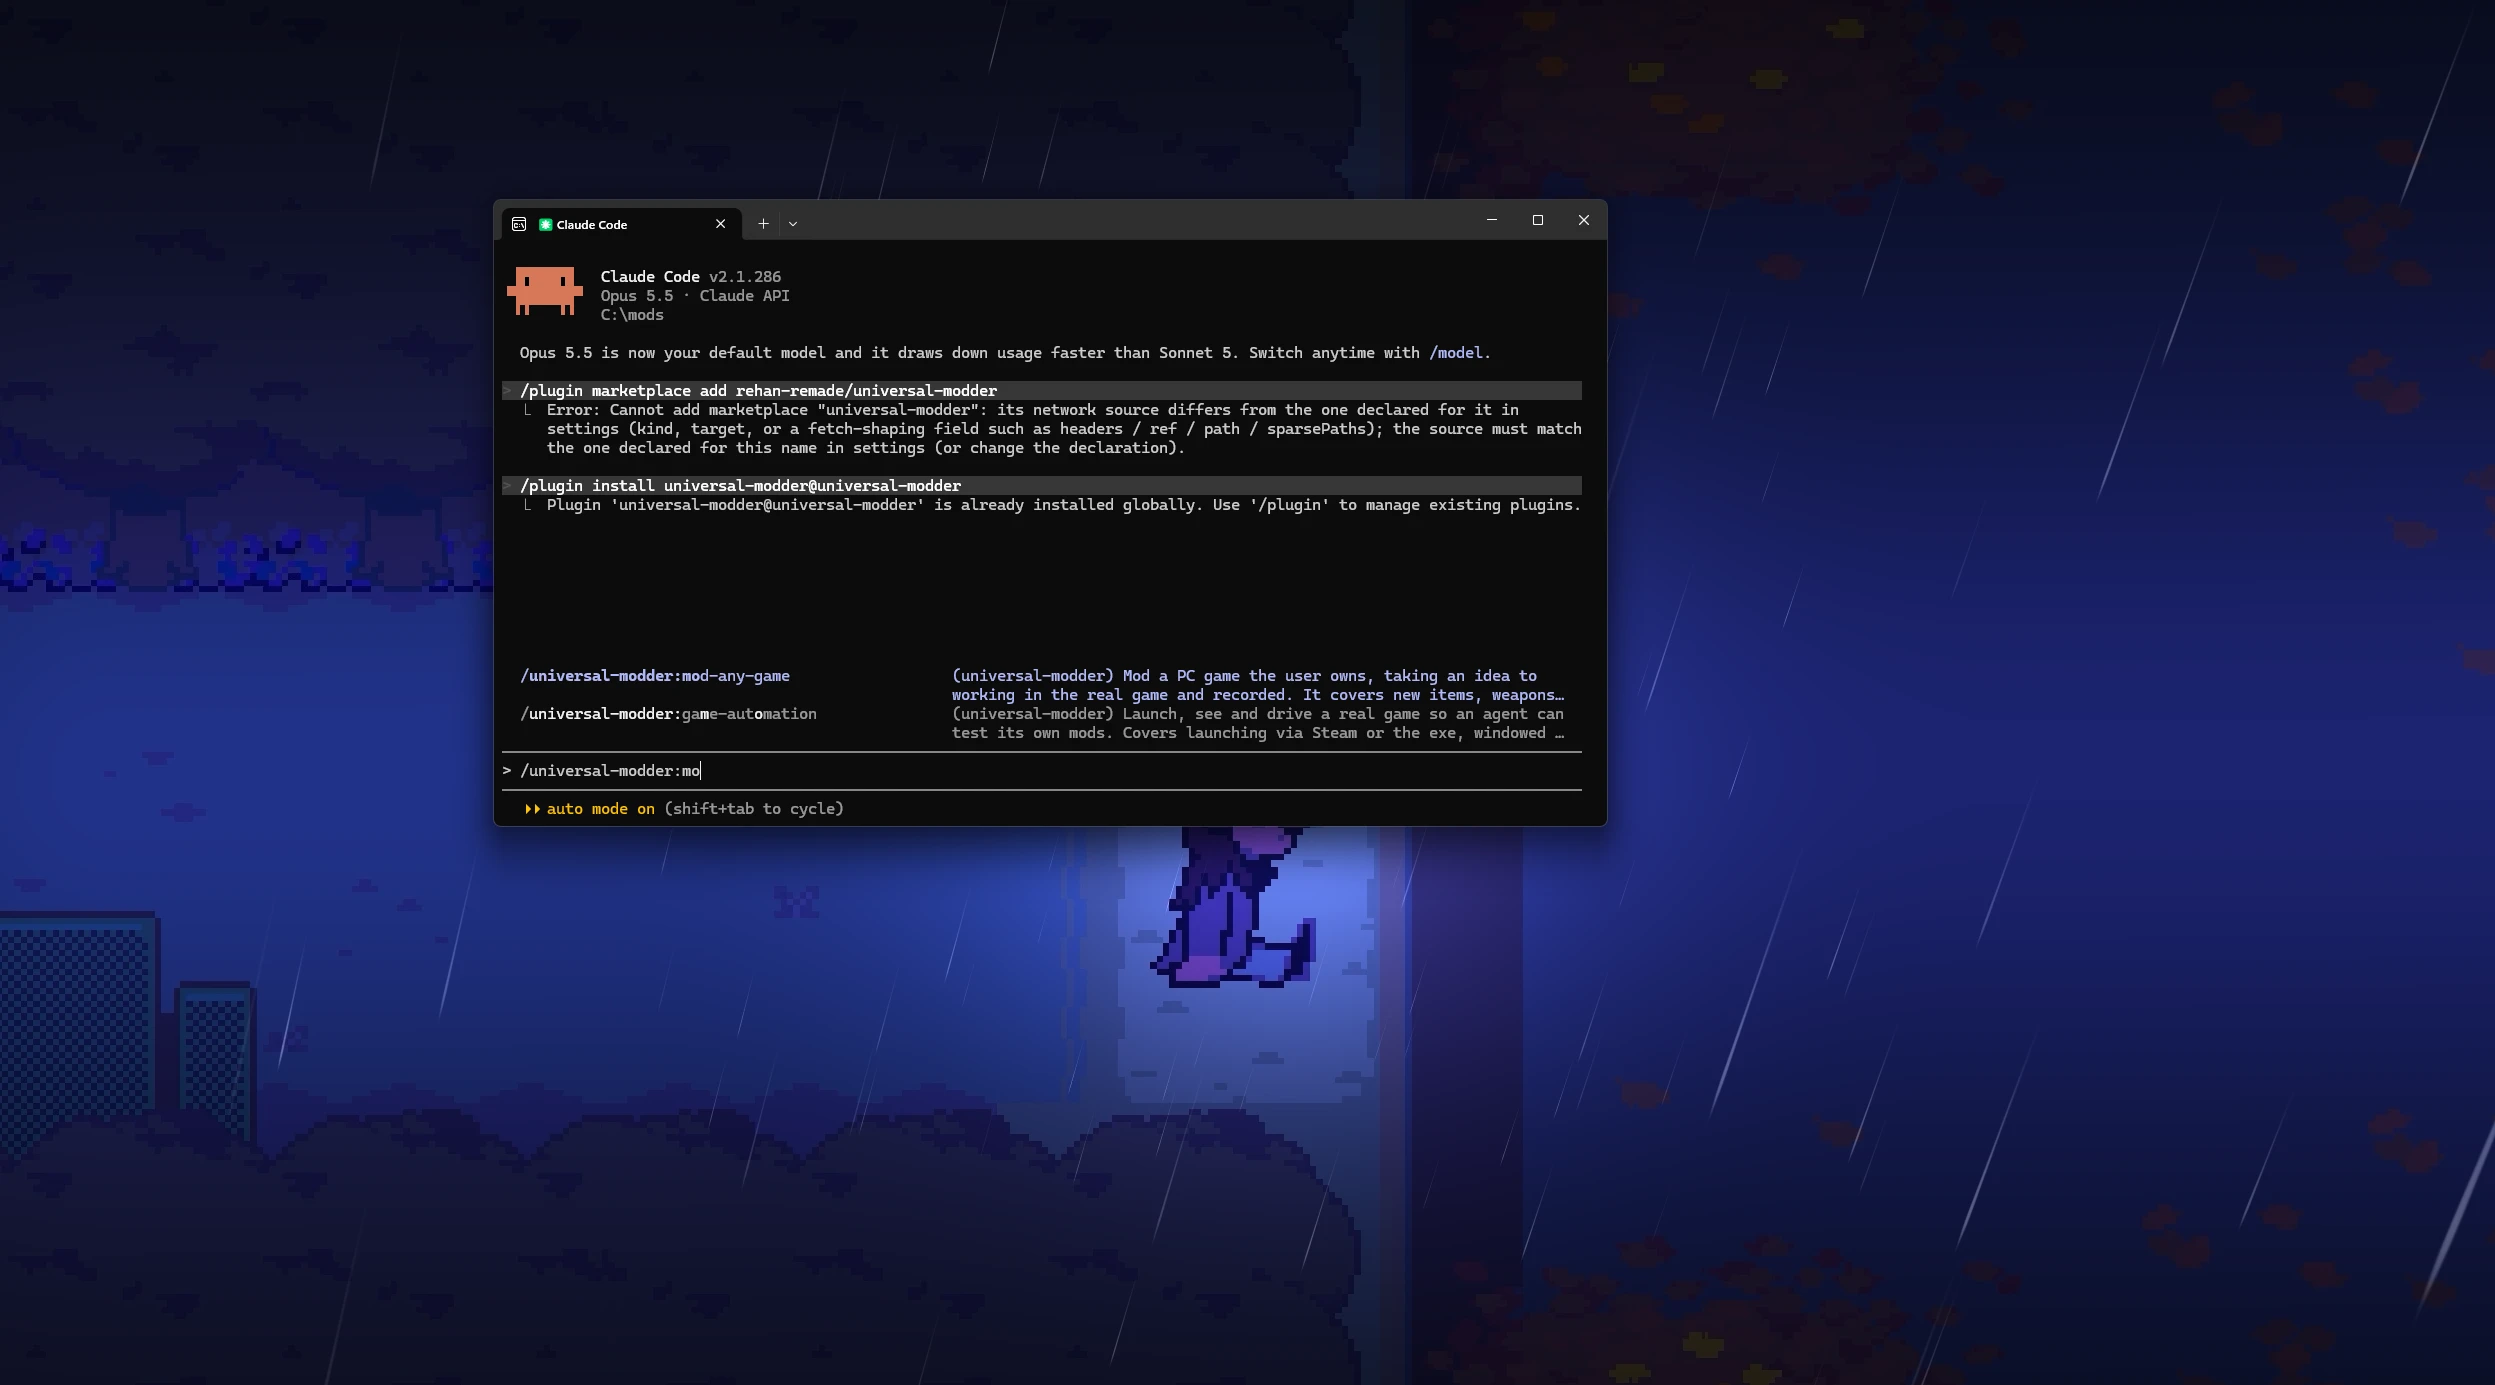
The plugin has two kinds of commands: skills invoked with a slash command inside Claude Code, and um utility commands that the agent runs in the terminal. You do not need to memorize them. In most cases, you can simply describe what you want in plain language and the agent will choose the appropriate skill. Still, knowing the commands helps you understand what the agent is doing.
Skills
All skills use the plugin prefix, for example /universal-modder:mod-any-game. You can write your task immediately after the skill name.
- mod-any-game. The main skill. It handles the entire project from the initial idea to a finished mod and includes playbooks for 12 engine families. This is the best place to start any project.
- game-recon. Reconnaissance before development begins. It identifies the engine, anti-cheat, save folders, and the mod loader commonly used by the community. The result is written to MODDING_PLAN.md.
- reverse-engineering. Examines game code and file formats using ILSpy, Ghidra, Cheat Engine, RenderDoc, and other tools.
- fal-assets. Generates sprites with transparent backgrounds, pixel art, textures, 3D models, sound effects, music, and voice through fal.
- asset-pipeline. Adapts graphics to the game's requirements, including background removal, frame sizing, palettes, sprite sheets, and rendering 3D models from the required angle.
- game-automation. Launches the game, captures screenshots, presses keys, and clicks through menus so the agent can test the mod itself.
- showcase-video. Records the game window with game-only audio and edits a short video with titles and music.
- mashup-mods. Combines two games, ports content from one game into another, and handles full conversions.
- publish-mod. Performs pre-release checks, packages the mod, creates a README with installation instructions, prepares credits, and writes a post for Nexus Mods, Steam Workshop, Thunderstore, mod.io, or GitHub.
- share-field-notes. Searches the knowledge base and writes a new field note based on the completed project.
How to Create a Mod With the Plugin

Let's go through the entire process using a Terraria mod as an example. Terraria is a good choice for a first mod because it has no anti-cheat, tModLoader is officially available on Steam, and the game has a huge modding ecosystem. You can check out our separate roundup of the best Terraria mods. The universal-modder knowledge base already contains detailed notes for the game. The process is essentially the same for other games, although the specific tools will change.
Before you start, make sure the game is purchased and installed through Steam. Then find the free tModLoader app in the Steam store and add it to your library. The loader will not run without it, and the agent will not bypass that ownership check. Launch tModLoader manually once so it can create its folders, then close it. Create a project folder, for example C:\mods\terraria-boomerang, open a terminal there, and launch Claude Code with claude.

Invoke the main skill and describe the task immediately. The more specific your request is, the fewer follow-up questions the agent will need to ask: /universal-modder:mod-any-game Make a mod for the Steam version of Terraria that adds a boomerang which bounces between enemies four times before returning to the player. Generate the sprites through fal in the game's visual style. The agent will clarify the details and ask what counts as a finished result. Usually, that means a working in-game mod and a 20-45 second video. If you do not need a video, say so at the start. A MODLOG.md work log will appear in the project folder.
Before launching the game with the mod for the first time, the agent creates a backup of your saves with um backup create. It also configures a separate save folder using the -tmlsavedirectory parameter. This keeps your real characters and worlds untouched. The agent switches the game to a fixed-size window so screenshots and click coordinates stay consistent. Wait for the project to finish, then test the result yourself. The agent will have built the complete working mod on its own.
Development Restrictions

The plugin has strict rules that the agent will not break even if you ask it to. Read through them before creating mods so you know the limitations in advance. The plugin will not:
- Modify online games protected by anti-cheat. This includes Easy Anti-Cheat, BattlEye, Vanguard, VAC on official servers, Ricochet, and ACE. Instead, the agent may suggest an offline mode, a private server, or official tools such as Steam Workshop or a map editor.
- Create multiplayer cheats. Aimbots, ESP, speed hacks, and similar tools are prohibited.
- Bypass protection. The agent does not tamper with anti-cheat, DRM, or game ownership checks.
- Distribute game files. A finished mod contains only your code, your assets, and patches. Extracted resources and decompiled code remain on your own computer.
- Work with games you do not own. The plugin does not download games, ROM files, or disc images.
Before installing a loader into a game folder, taking control of the mouse and keyboard, or publishing anything, the agent asks for permission. Before modifying the Windows Registry, the utility creates a backup of the relevant key.
Tips for Beginners
- Start with games that already have a popular mod loader, such as Terraria, Stardew Valley, Minecraft, or Unity games. The agent will reach a working result faster.
- Give it one small task at a time. Once the first item works, ask it to add the next one.
- Before expensive generations, ask for the price. The agent can check it with um fal price.
- If the project stretches across several days, start a new session in the same folder and ask it to Read MODLOG.md and continue. The log contains everything the agent needs to pick up where it left off.
- Do not use the computer while the agent is testing the game or recording a video. Extra mouse clicks can throw off its coordinates.